
TL;DR: The injection molding process is a precise, multi-step manufacturing method used to produce high-quality plastic parts at scale. This blog breaks down each phase, from initial design to final inspection, so you understand how expert control at every stage ensures repeatable, defect-free parts.
Main points:
- Design & Engineering: CAD modeling, material selection, mold flow analysis, and DFM principles ensure manufacturability and performance.
- Mold Fabrication: High-precision machining of steel or aluminum molds with tolerances as tight as ±0.001 inches.
- Injection Molding Production: Controlled injection of molten plastic under high pressure, followed by cooling and ejection in rapid cycles.
- Post-Processing & Finishing: Trimming, secondary operations, assembly, inspection, and packaging to meet cosmetic and functional standards.
- Expertise Matters: Each stage affects cost, quality, and speed—professional execution ensures reliable results at scale.
When manufacturing high-quality plastic parts at scale, few methods are as efficient and reliable as the injection molding process. But what is the injection molding process, exactly?
In simple terms, it’s a manufacturing technique that involves injecting molten plastic into a precision-engineered mold. This entire process creates consistent, repeatable parts with tight tolerances. It suits most parts from automotive components to aerospace interiors and medical devices, playing a critical role across a wide range of industries.
In this blog, we’ll walk through each step of the injection molding process, giving you a clear understanding of how it works and why it matters.
Step 1: Design & Engineering
Every successful injection molding project starts with precise design and engineering. Engineers begin by creating a 3D CAD model of the part. They define
- Dimensions
- Tolerances
- Wall thickness
- Material flow
Geometry must support uniform cooling and stress distribution. Undercuts, sharp corners, and thick sections create risk. Engineers eliminate these early on in this stage of the injection molding process.
Next, the team selects a suitable thermoplastic. Material choice affects strength, flexibility, chemical resistance, and thermal performance. Common options include:
- ABS
- Polycarbonate
- Nylon
- Polypropylene
Each comes with specific shrink rates and molding conditions.
Tooling design follows. Engineers run mold flow simulations to predict how material fills the cavity. They identify air traps, weld lines, and potential voids. Gate locations, runner systems, and venting points are optimized. Cooling channels are added to minimize cycle times and warping.
Designers use DFM (Design for Manufacturability) principles throughout. They ensure the part can eject cleanly and fill completely. Draft angles are added to vertical walls to aid release. Tolerance stacks are calculated to meet critical fits and functional requirements.
Once the design is validated, engineers release tool designs for machining. They specify steel types, surface finishes, and critical dimensions. Tight tolerances are held to ensure part accuracy and repeatability.
Design and engineering control cost, speed, and quality. Poor design leads to defects, rework, and delays. Strong engineering delivers parts that meet performance standards from the first run. At RCO Engineering, we invest heavily in front-end design to guarantee production success.
Step 2: Mold Fabrication
Mold fabrication begins once the tool design is finalized. Precision is critical. Machinists cut cavities into high-grade steel or aluminum blocks using CNC milling, EDM, and grinding. Steel offers durability for high-volume runs. Aluminum molds suit lower volumes with faster turnaround.
Each mold includes core and cavity plates, ejector systems, guide pins, and cooling channels. Tight tolerances, often within ±0.001 inches, ensure part accuracy. Surface finishes must match the part’s cosmetic or functional requirements.
Engineers inspect each component during machining. They verify dimensions, flatness, and alignment. After machining, technicians assemble the mold and test all mechanical functions, ejectors, slides, and lifters.
Toolmakers perform trial shots to confirm performance. They adjust gates, venting, and cooling as needed. Once approved, the mold is ready for production.
At RCO Engineering, we fabricate molds to exacting standards. This ensures consistent part quality, minimal downtime, and long tool life, essential for demanding applications in automotive, aerospace, and beyond.
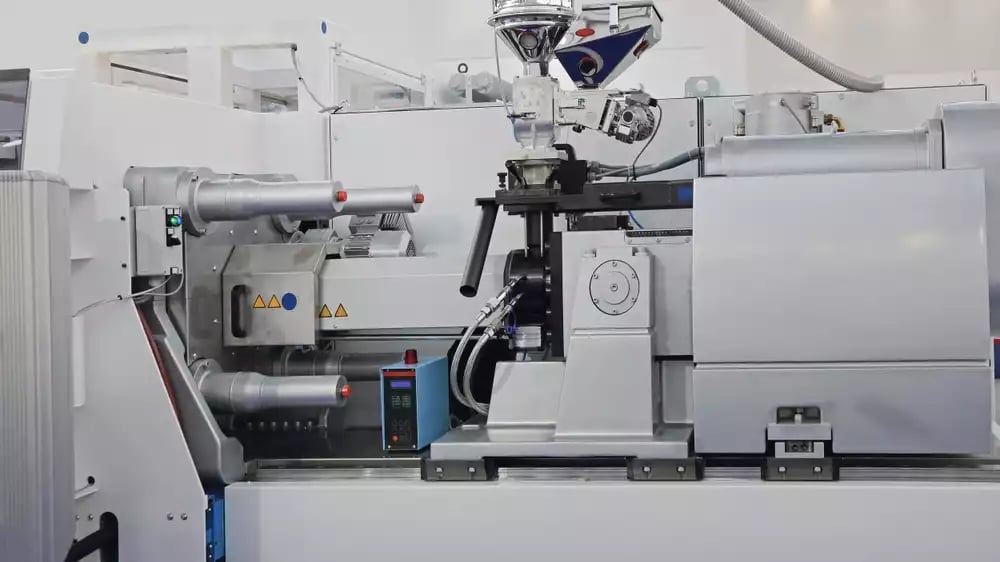
Step 3: Injection Molding Production
Injection molding production begins with machine setup. Technicians install the mold, calibrate settings, and load resin. Material enters a heated barrel, where a rotating screw melts and mixes it. Precise temperature control prevents degradation in this stage of the injection molding manufacturing process.
The machine injects molten plastic into the mold under high pressure, typically 10,000 to 30,000 psi. The material fills the cavity in seconds. Uniform fill prevents voids, sink marks, and short shots.
Next comes cooling. The mold’s internal channels circulate water or oil to control temperature. Proper cooling ensures dimensional stability and reduces cycle time.
Once cooled, the mold opens. Ejector pins remove the part. The cycle repeats, often in under a minute, depending on part complexity.
Operators monitor key parameters: pressure, temperature, cycle time, and shot size. In-line inspections check part dimensions and surface quality.
At RCO Engineering, we control every production variable to ensure repeatability, tight tolerances, and high-quality results at scale for every industry we serve.
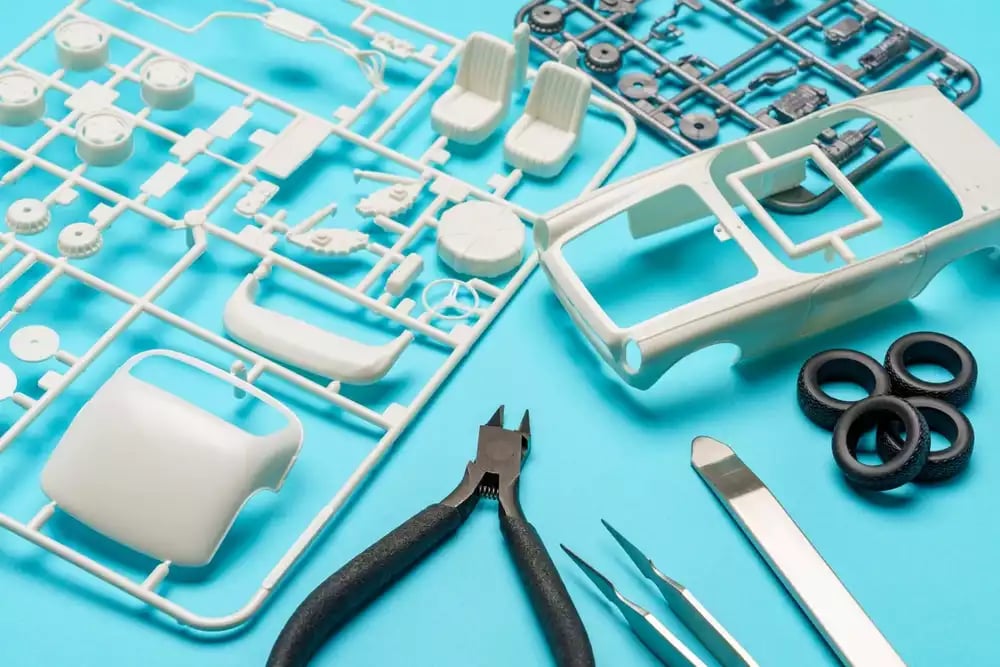
Step 4: Post-Processing & Finishing
After molding, parts move to post-processing. Technicians remove excess material such as sprues, runners, and flash. This is done through trimming, machining, or automated deflashing.
If required, parts undergo secondary operations. These include ultrasonic welding, heat staking, pad printing, or painting. Each process in injection molding production follows strict specifications for alignment, adhesion, and surface quality.
Assembly may follow. Teams join molded components with metal inserts, fasteners, or adhesives. Fixtures and gauges ensure precision and consistency.
Parts then go through final inspection. Technicians check dimensions, cosmetic appearance, and functional performance. Measurement tools include calipers, gauges, and CMMs. Packaging comes last. Clean, damage-free parts are packed according to customer requirements. Labels include part numbers, lot tracking, and quality stamps.
At RCO Engineering, we treat post-processing as critical. Every step supports part integrity, function, and appearance. We ensure final products meet exact standards before reaching the customer.
Why Process Expertise Matters
The injection molding process is complex, precise, and unforgiving of error. Each stage, from design to final inspection, directly impacts part performance, cost, and delivery time. Without expert control at every step, defects, delays, and added expense become inevitable.
If you’re ready to bring your part designs into production with precision and efficiency, professional injection molding can make it happen. Our team provides comprehensive injection molding services backed by technical expertise and quality control. Learn more about how we support your project at every stage of the process. Explore our injection molding services here.
Comments